How to Stop Basement Water Leaks?
Basement water rarely appears without a reason. It may enter through a hairline foundation crack, a cold joint, a window well, or pressure beneath the concrete floor. At first, the signs can seem minor: a damp smell, peeling paint, or a dark mark near the wall. Then a heavy storm arrives, and the problem becomes impossible to ignore. Wet cardboard, swollen wood, and a humming dehumidifier tell a clearer story.
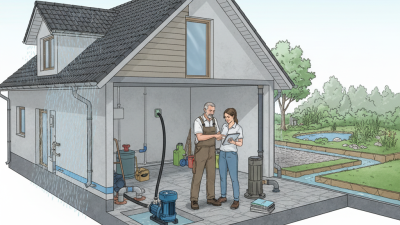
Joseph Lstiburek, a respected building-science expert, puts the principle simply: “The best way to deal with water is to keep it out of the building.” That advice guides this introduction to basement water leaks. Effective control usually begins outdoors, with clean gutters, extended downspouts, and soil that slopes away from the foundation. Interior systems may still help, especially when excavation is impractical. However, a sump pump alone is not a complete solution.
Look closely.
A reliable diagnosis matters more than a quick patch. Water stains can travel, so the visible mark may not show the entry point. A small crack might be harmless, or it might signal movement that needs professional evaluation. There is no perfect repair for every basement. Some homes need drainage improvements, while others require foundation waterproofing or plumbing repairs. This guide explains the warning signs, practical repair paths, and maintenance habits that can reduce basement water damage. It also questions common shortcuts, because sealing a wall without controlling the source may only hide the problem temporarily.
Identify the Source and Severity of the Basement Water Leak
How to Stop Basement Water Leaks?
Identify the Source and Severity of the Basement Water Leak
Begin with the water’s location, timing, and appearance. Clear water near a wall may indicate groundwater pressure or a failed drain. Water beneath a bathroom could point to a hidden plumbing leak. Brown stains, white mineral deposits, and peeling paint suggest repeated moisture, not one bad storm. The U.S. Environmental Protection Agency warns that mold can begin growing within 24 to 48 hours after water exposure. That window is easy to underestimate.
Severity matters more than the puddle’s size. FEMA estimates that one inch of floodwater can cause roughly $25,000 in damage to a home. Check whether water is still entering, whether drywall feels soft, and whether floors have swollen. Musty odors can signal concealed growth. Keep away from wet electrical outlets and shut off power only from a safe, dry location. A moisture meter helps, but it cannot reveal every cavity behind a finished wall. My first reading might be wrong.
Tips: Photograph stains before cleaning them. Mark the waterline with a pencil. Test during rain if safe. Inspect gutters, downspouts, window wells, and sump discharge paths. Do not seal a crack before confirming its cause. A quick patch may hide pressure and move the leak elsewhere. If water rises rapidly, materials remain wet, or structural cracks widen, arrange an evaluation by a qualified waterproofing or building professional. EPA guidance also supports removing wet porous materials promptly, because delayed drying increases mold and material damage risks.
Inspect Exterior Drainage and Foundation Conditions
Basement water often begins outside, where small drainage failures keep the foundation damp. Walk the property after heavy rain, not during a dry week. Gutters should carry roof water into downspouts, then discharge well away from the foundation. The ground should slope away from the wall. A common residential standard calls for roughly six inches of fall across ten feet. Check for soil settlement, clogged outlets, and splash marks beneath downspouts. These details reveal water paths quickly.
FEMA estimates that one inch of indoor floodwater can cause about $25,000 in damage. That figure explains why exterior inspection deserves more attention than a quick basement patch. Examine foundation walls for horizontal cracks, stair-step cracks, peeling coatings, and white efflorescence. Efflorescence is not always structural damage, but it proves moisture has traveled through masonry. Look closely around pipe penetrations and window wells. Window wells need clear drainage and secure covers, especially after snowmelt.
The U.S. Environmental Protection Agency’s WaterSense research reports that household leaks can waste nearly 10,000 gallons annually. A leaking outdoor connection can add pressure around the foundation without obvious indoor flooding. I prefer testing drainage with a hose in short sections, watching where water collects. Do not flood the soil deliberately. Record photographs and measurements before repairs. I have seen owners blame cracks while ignoring a downspout buried beside the wall. That mistake is easy to repeat. Drainage checks should also happen after landscaping changes, because fresh soil can quietly redirect water toward the foundation.
Seal Cracks, Joints, and Other Basement Entry Points
How to Stop Basement Water Leaks?
Basement water often enters through cracks, wall joints, windows, and pipe openings. A hairline crack may seem harmless, but pressure from wet soil can widen it over time. In practice, staining is only a clue. The actual entry point may sit several inches away. Dry the wall and mark the damp trail. This small step prevents guesswork.
Remove loose concrete, dust, and paint around each crack. Clean surfaces allow repair material to bond properly. Narrow, stable cracks can often receive a suitable waterproof repair compound. Larger or moving cracks need more careful treatment. Joint lines between the floor and wall deserve special attention. They can open slightly as the structure shifts. A patch over dust may look finished. It may fail quickly.
Inspect around basement windows and utility pipes. Seal gaps with materials designed for masonry and changing moisture conditions. Do not block drainage paths or cover active leaks without finding their source. After the repair cures, test the area with a gentle hose spray. Watch the inside wall for several minutes. If moisture returns, stop adding layers. Repeated failure may indicate hydrostatic pressure, poor exterior drainage, or structural movement. A qualified waterproofing professional should assess those conditions. The first repair is not always the right repair. That is worth remembering.
Install Interior or Exterior Waterproofing Solutions
Basement leaks often begin with small clues: damp corners, white mineral stains, or a musty smell after rain. Before choosing a repair, inspect the foundation, gutters, soil slope, and nearby plumbing. Water may enter through wall cracks, floor joints, or poorly sealed windows. Ignoring the source can make a simple repair more expensive.
Exterior waterproofing addresses water before it reaches the foundation wall. A contractor may excavate the soil, repair cracks, apply a waterproof membrane, and install a drainage layer. Clean, properly graded soil also helps direct rainwater away from the house. This method can be highly effective, but excavation may disturb patios, landscaping, or utility lines.
Interior waterproofing manages water that has already entered the basement. A drainage channel beside the footing can guide seepage toward a sump basin and pump. Wall coatings may reduce moisture, but they cannot solve strong hydrostatic pressure alone. Interior systems are often less disruptive and easier to install during winter. Still, they require reliable drainage and backup planning during power failures.
Do not seal a wet wall blindly. That approach can trap moisture and hide structural movement. I have seen repair plans focus on visible stains while missing blocked downspouts outside. The better decision depends on leak timing, soil conditions, foundation materials, and the building’s drainage history. A qualified waterproofing professional should document these conditions before recommending interior or exterior work.
Prevent Future Leaks Through Drainage and Routine Maintenance
Basement leaks rarely begin at the wall. They often start where rainwater collects beside the foundation. During a heavy storm, I once found water entering through a cold joint near the floor. The downspout ended too close to the house. Moving it several feet away reduced the problem, but did not solve it. Soil still sloped inward. Water followed the easiest path.
Keep gutters clear, especially after autumn leaves fall. Extend downspouts at least six feet from the foundation, when site conditions allow. Check the discharge area after rain. It should drain away, not form a muddy pool. The ground beside the basement should slope outward for several feet. Add compacted soil carefully, because loose fill can settle and recreate the leak. I learned this the hard way.
Inspect window wells, covers, cracks, and exposed masonry twice each year. A small crack can widen during freeze-thaw cycles. Test the sump pump before storm season, and clean its inlet screen. Consider a battery backup if flooding could damage essential equipment. Interior sealants may hide stains temporarily, but they cannot correct outside drainage. If water persists, a qualified drainage professional should assess grading, footing drains, and groundwater pressure.
How to Stop Basement Water Leaks? - Prevent Future Leaks Through Drainage and Routine Maintenance
| Water-Leak Risk Area | Recommended Prevention Measure | Routine Frequency | Practical Performance Indicator | Priority |
|---|---|---|---|---|
| Clogged gutters and downspouts | Remove leaves and sediment, then confirm that downspouts discharge water away from the foundation. | At least twice a year and after major storms | Water flows freely without overflowing at the roof edge or wall connection. | High |
| Short or poorly directed downspouts | Extend discharge points so roof runoff drains away from the foundation instead of collecting beside basement walls. | Inspect seasonally and after landscaping changes | No visible pooling or soil erosion next to the foundation after rainfall. | High |
| Ground slope toward the house | Maintain a gradual slope away from exterior walls so surface water is directed toward a suitable drainage area. | Check annually and after soil settlement | Rainwater moves away from the foundation without flowing back toward the wall. | High |
| Foundation wall cracks | Record crack locations and changes, keep exterior drainage working, and obtain a professional assessment for growing or structural-looking cracks. | Inspect every 6–12 months and after prolonged wet weather | No increase in crack width, dampness, staining, or efflorescence. | Medium–High |
| Window wells | Remove debris, keep the well clear, and verify that its drain is not blocked. Use a properly fitted cover where appropriate. | Inspect twice a year and before heavy rain | The well does not retain standing water after rainfall. | Medium–High |
| Sump pump failure | Test the pump, float switch, discharge line, and backup power arrangement. Keep the pit free of debris. | Test every 3 months and before wet seasons | The pump starts automatically, removes water, and sends discharge away from the foundation. | High |
| Blocked floor drains | Remove surface debris, check for slow drainage, and arrange appropriate drain cleaning when backups or recurring odors occur. | Inspect every 3–6 months | Water drains promptly without gurgling, backup, or persistent foul odor. | Medium–High |
| Plumbing supply and drain lines | Inspect exposed pipes, valves, water heaters, and connections for corrosion, condensation, or active drips. | Inspect every 6–12 months | No unexplained moisture, water stains, pressure changes, or unexpected water-use increases. | Medium–High |
| Interior condensation | Improve ventilation, repair visible moisture sources, and use controlled dehumidification when indoor humidity remains high. | Monitor monthly and during humid weather | Walls, pipes, and floors remain dry with no recurring mold-like odor. | Medium |
| Basement storage and finishes | Keep boxes and furnishings elevated from the floor, maintain access to walls and drains, and avoid covering signs of moisture. | Review every 3 months | Walls, floor edges, and stored items remain accessible for inspection and free of new staining. | Medium |
Related Posts
-
How to Effectively Pump Basement Water and Prevent Future Flooding
-

Top 10 Basement Water Solutions to Prevent Flooding in 2025
-

How to Choose the Best Basement Drainage System for Your Home in 2025
-
10 Best Ways to Prevent Basement Water Damage?
-
10 Essential Tips for Choosing a Battery Backup Sump Pump
-
How to Choose the Right Drainage Pump for Your Home Needs